A custom tracking domain is essentially your own branded subdomain that’s used to track clicks, impressions and transactions, rather than relying on the default, shared tracking domains provided by us.
It helps you take control of your tracking links and create a more professional and trustworthy experience for your publishers.
Adding CNAME Records in your domain account
Here’s a breakdown of the steps. For the sake of this article, we’ll use GoDaddy as an example.
1. Log in to your GoDaddy Account
- Go to the GoDaddy website and log in to your account.
2. Access Your Domain Portfolio
- Go to your My Products page.
- Find your Domains section and select the domain you want to manage.
3. Manage DNS
- On the domain settings page, find and select DNS or Manage DNS. This will take you to the DNS Management page.
- Add three new records (read points 4 and 5 on how to do it) based on the values you can find in your Offer Settings under the “Custom Tracking Domain” add-on:

4. Add a New Record
- Click the Add New Record or Add button.
- From the Type dropdown menu, select CNAME.
5. Enter the CNAME Record Details
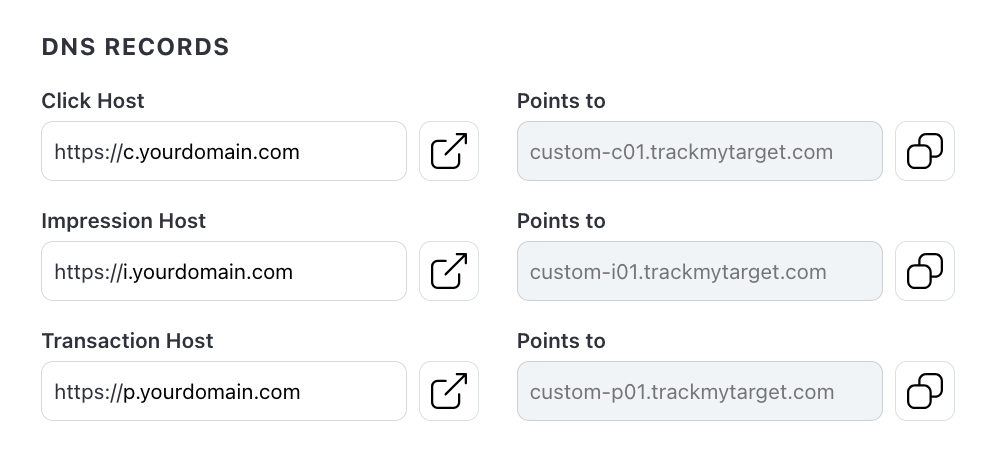
- Name (Host):
Enter the subdomain you want to create. For example, if you want “c.yourdomain.com,” enter “c.”
Note: you do not need to enter the full domain name, just the sub domain prefix. - Value (Points to):
Enter the target domain name. This is the domain you want the subdomain to point to. For example, “custom-c01.trackmytarget.com”.
It is very important to enter the complete target domain name. - TTL (Time to Live):
This determines how long DNS servers cache the record. The default setting is usually fine.
6. Save Your Changes
- Click Save or Save All Records.
7. Wait for Propagation
- DNS changes can take some time to propagate across the internet. It can sometimes take up to 48 hours, but often it’s much faster.